In 2016 I decided I needed a shed. You can buy prebuilt sheds of all kinds, but I wasn’t happy with their price or quality. So I decided to build it myself, from scratch, with gravel, lumber, and nails. Did I mention that I’m a stubborn do-it-yourself-er?
Planning Foundation
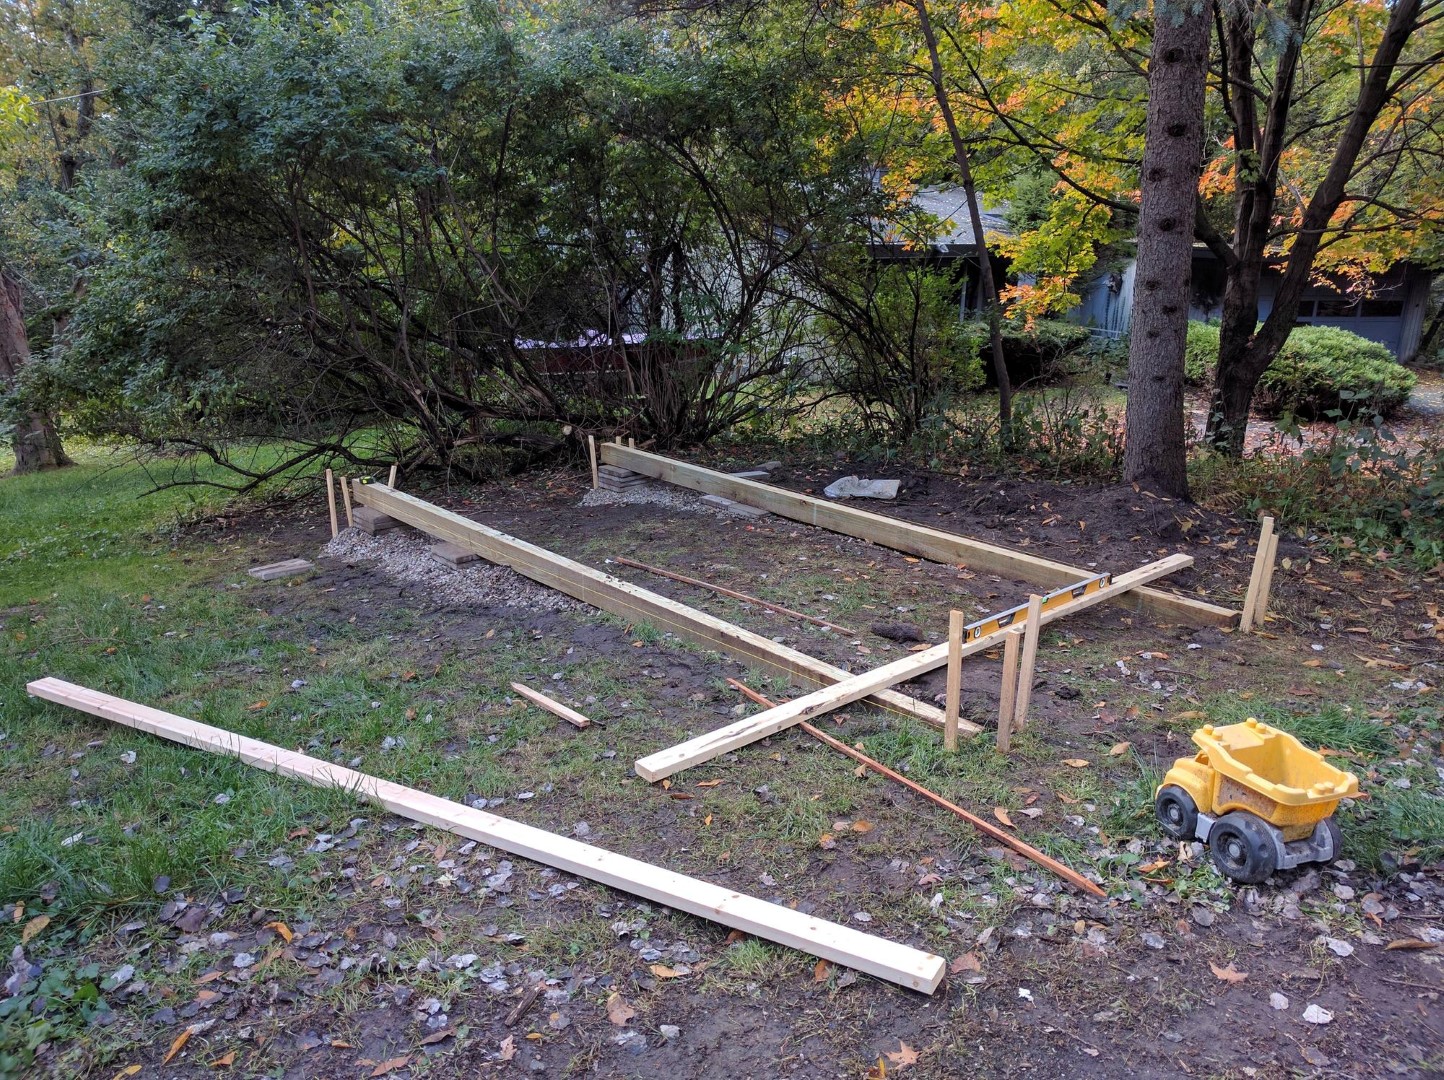
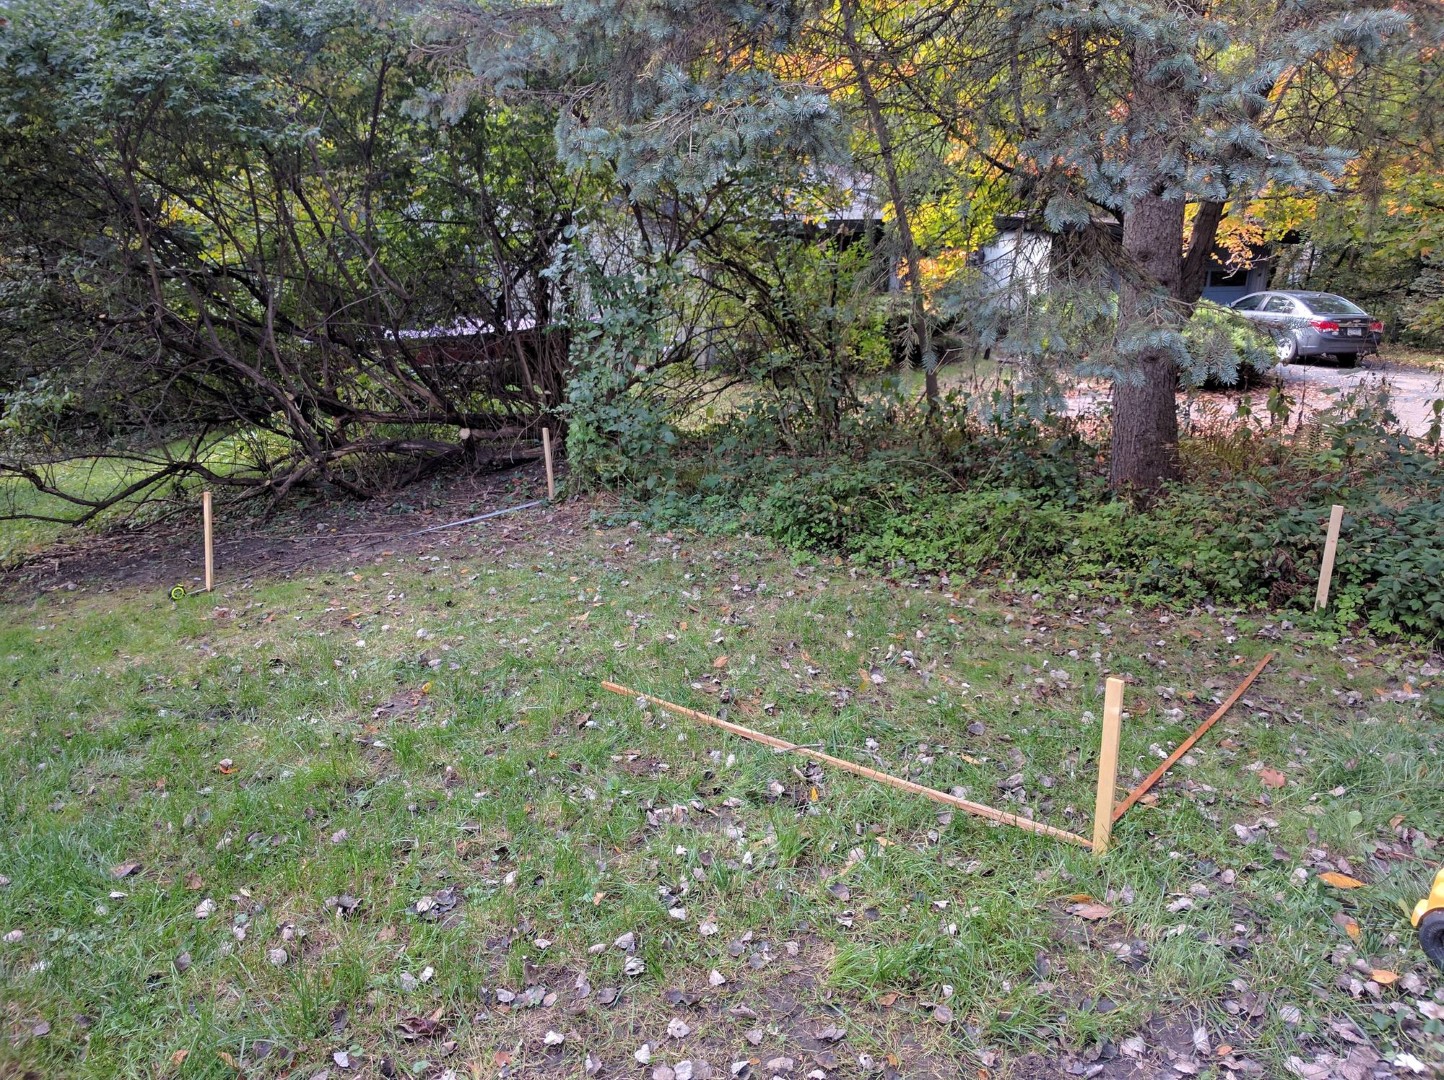 No lumber yet, so foundation planning started with stakes and string.
Breaking Ground
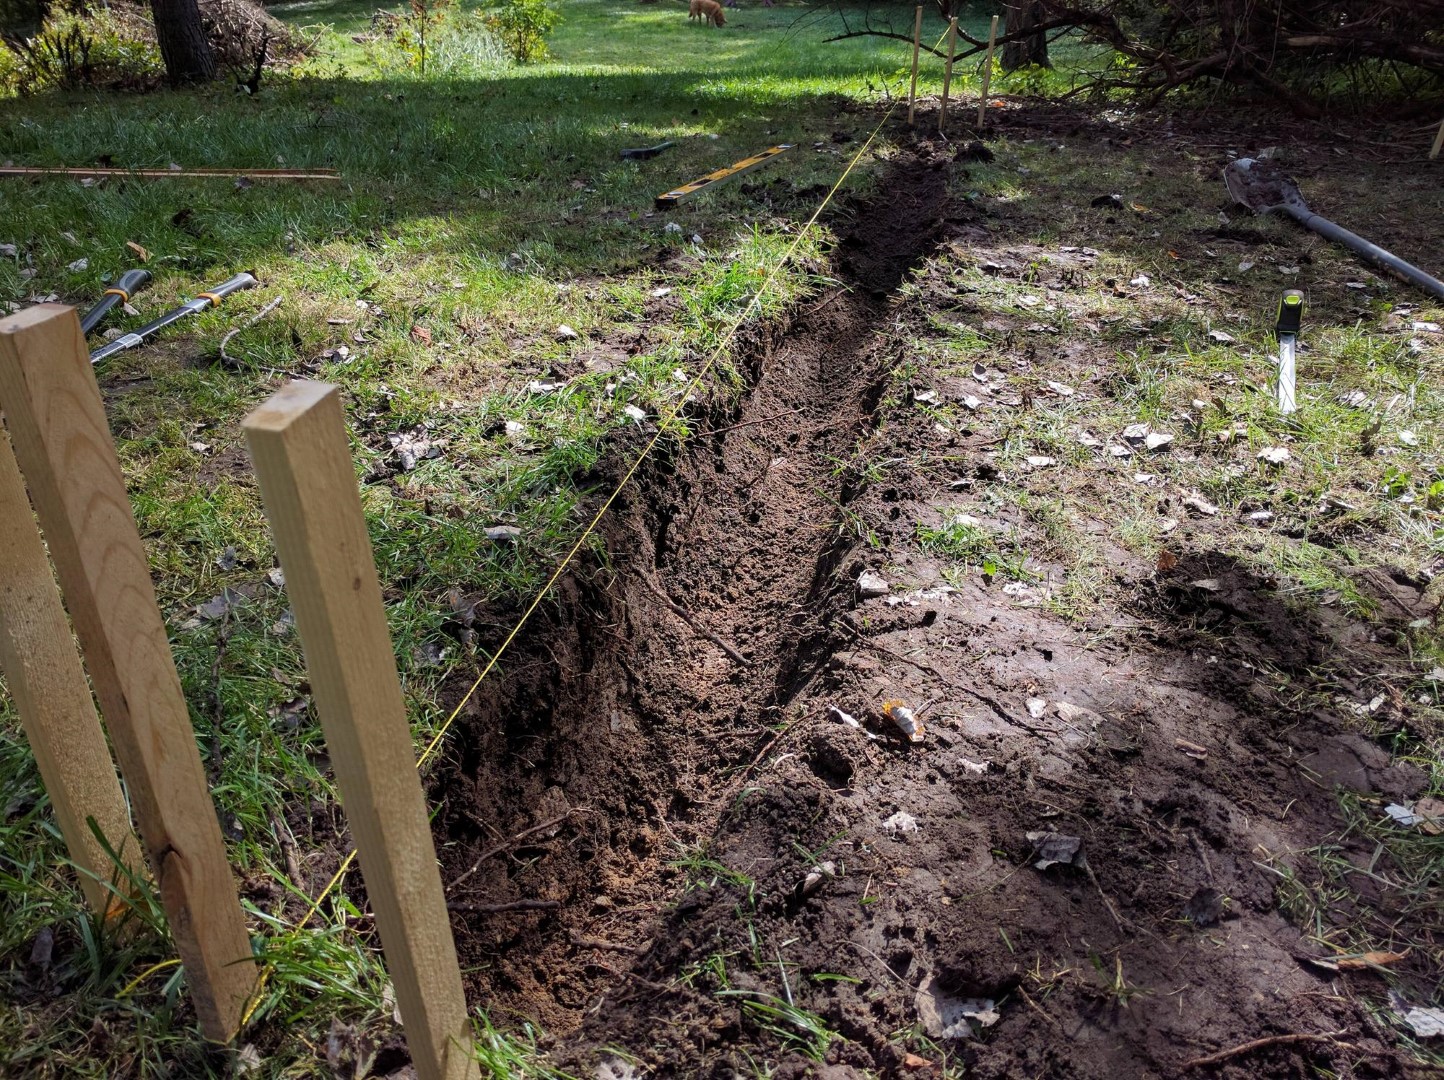 String hung and leveled. The string represents roughly where the top of the 4x6 rail will go. I wanted at least 6” of gravel under the rails so I dug 12” below the string.
Trenches Complete
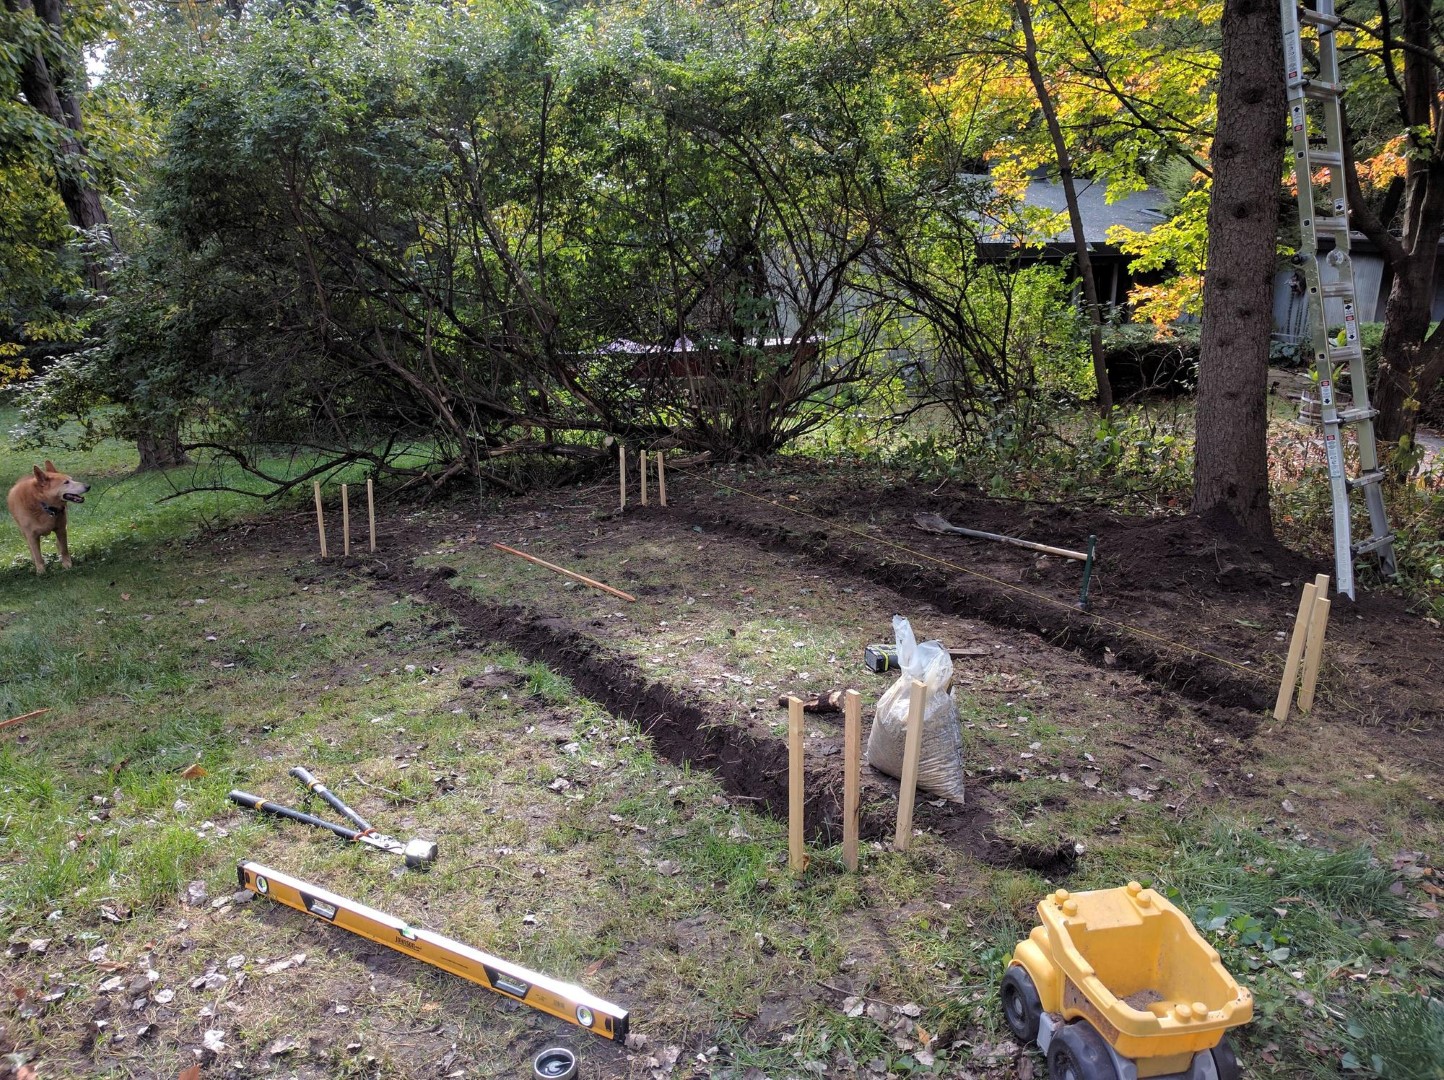 Time to fill the trenches with gravel. Bonus dog.
Gravel Fill
Measuring and Leveling Gravel
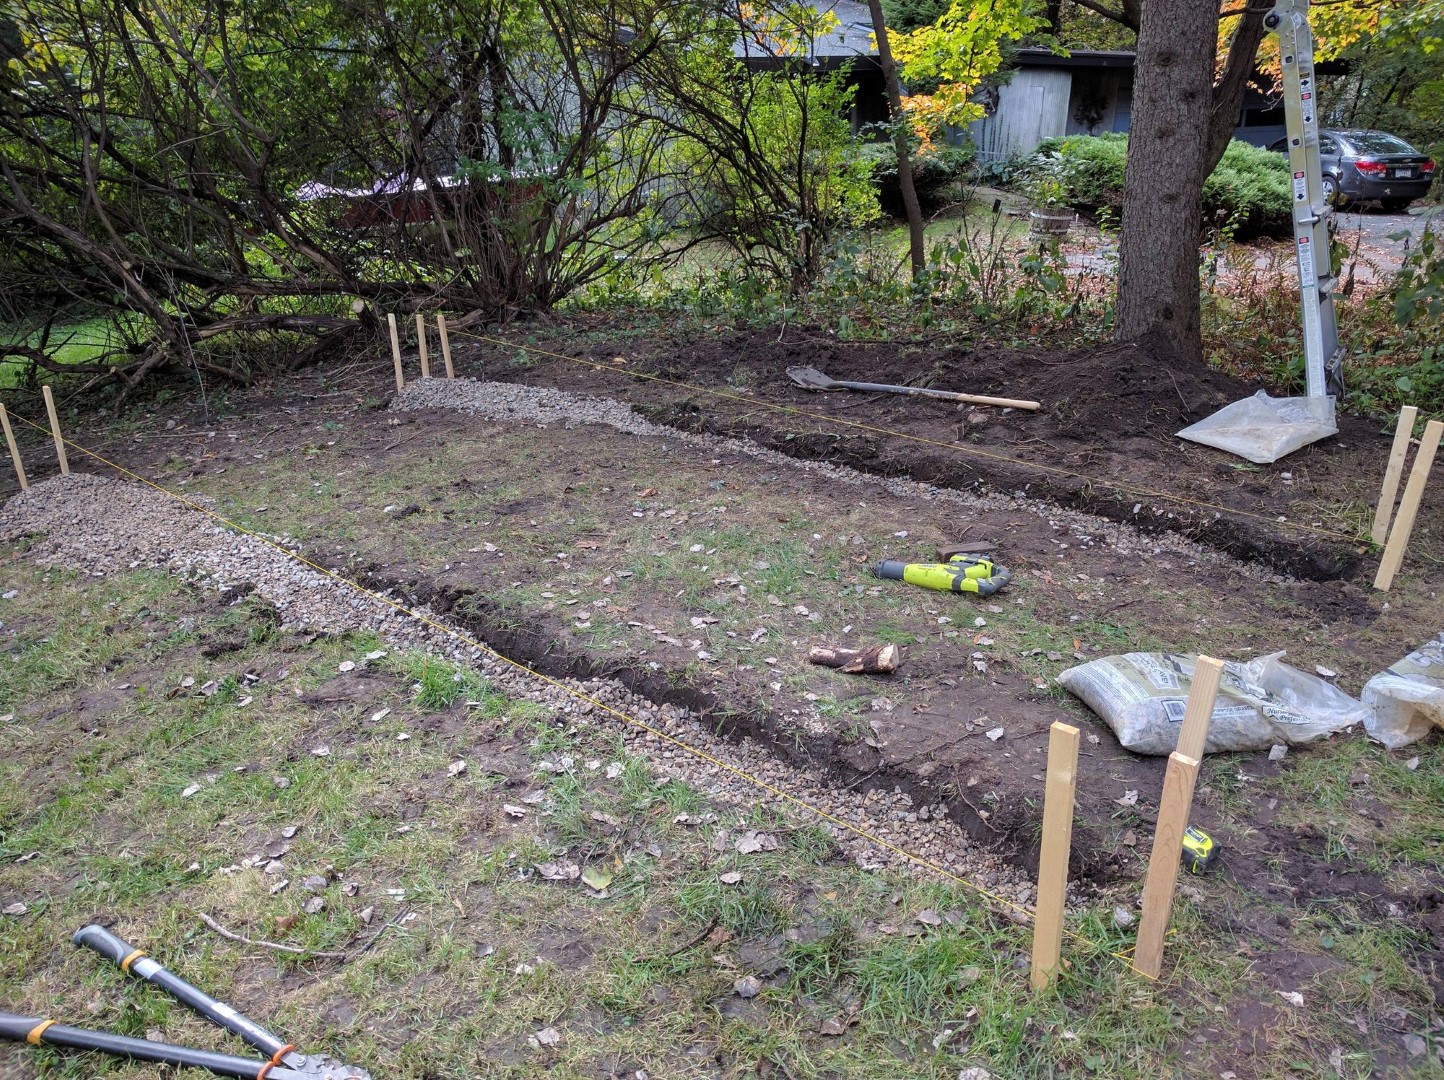
 Leaving 6” for the rail. Handy dandy measuring stick makes checking easy.
Lumber arrived!
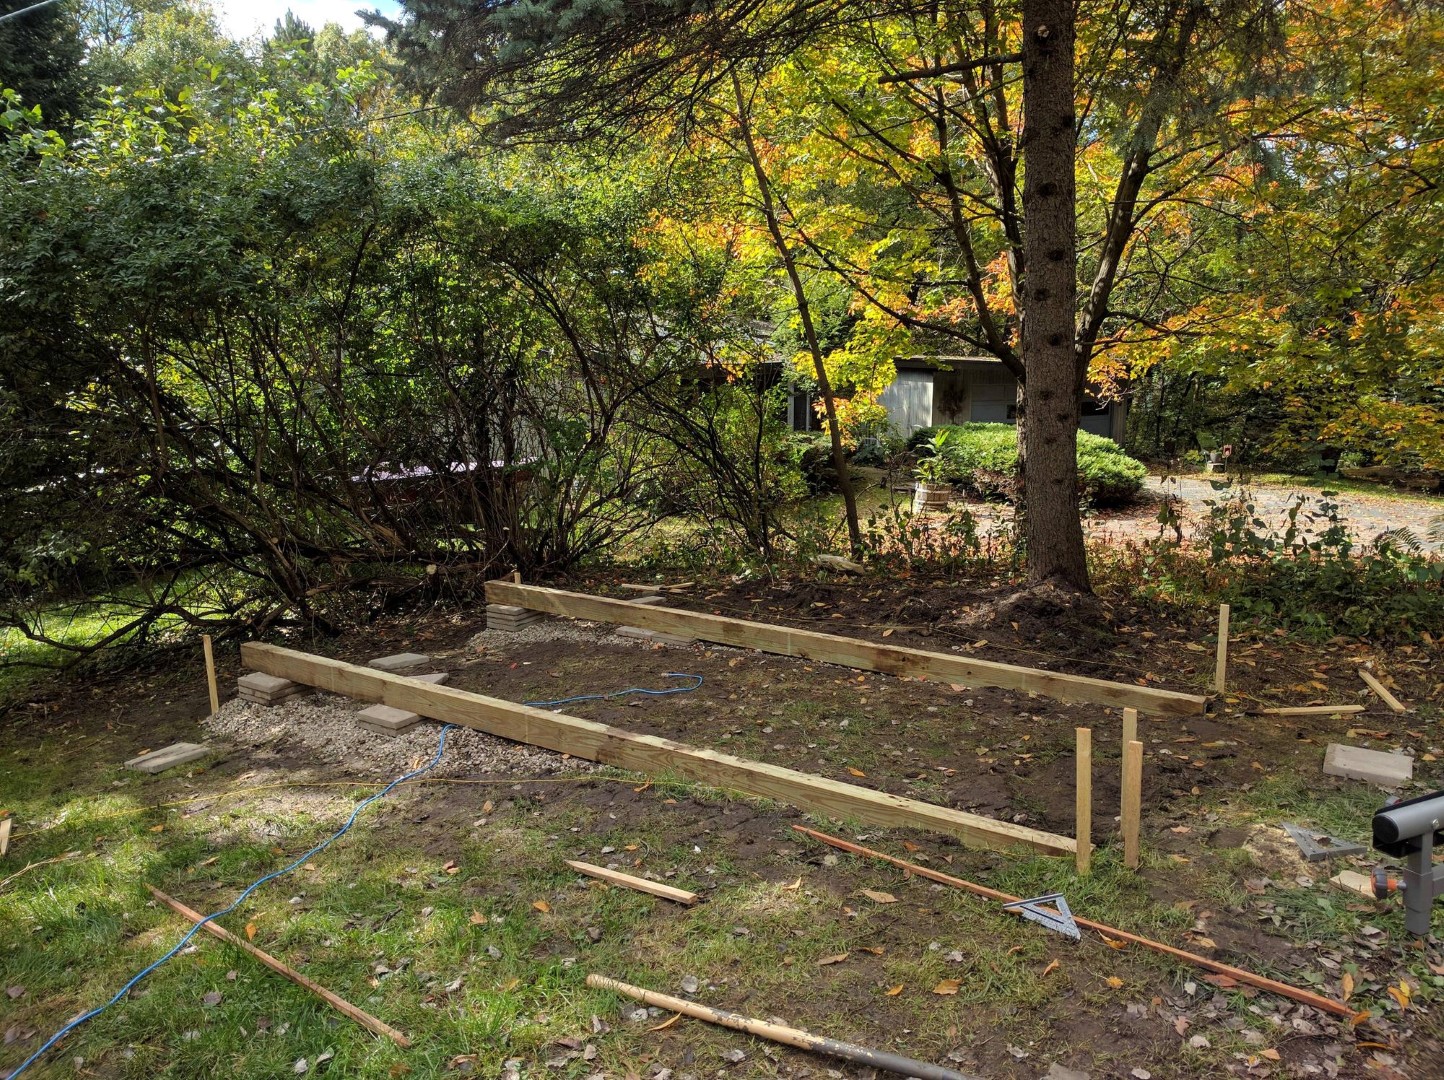
 Once lumber arrived, the painstaking work of squaring and leveling the rails began. Concrete blocks, spaced no more than 4’ apart, were used for the parts of the rail above grade.
Also, 4x6, 16’, treated lumber is no fun at all. Good if you’re training like Rocky Balboa; bad if you like the current alignment of your vertebrae.
Level and Square
 I’m sure the average viewer of this photo will have no appreciation for how awesome it feels when two planks of wood are level with each other and square.
Joists Assembled!
 Well that was quick. Not pictured: carrying and cutting 2x8 treated planks and nailing them to the rims, and finally nailing the joists to the foundation rails.
Floor Down, Truss Prototyping
 Flooring was one aspect of the design that was beefed up from standard. 3/4” treated plywood was selected for superior strength and durability for storing heavy or wet things, like a motorcycle or a lawn tractor.
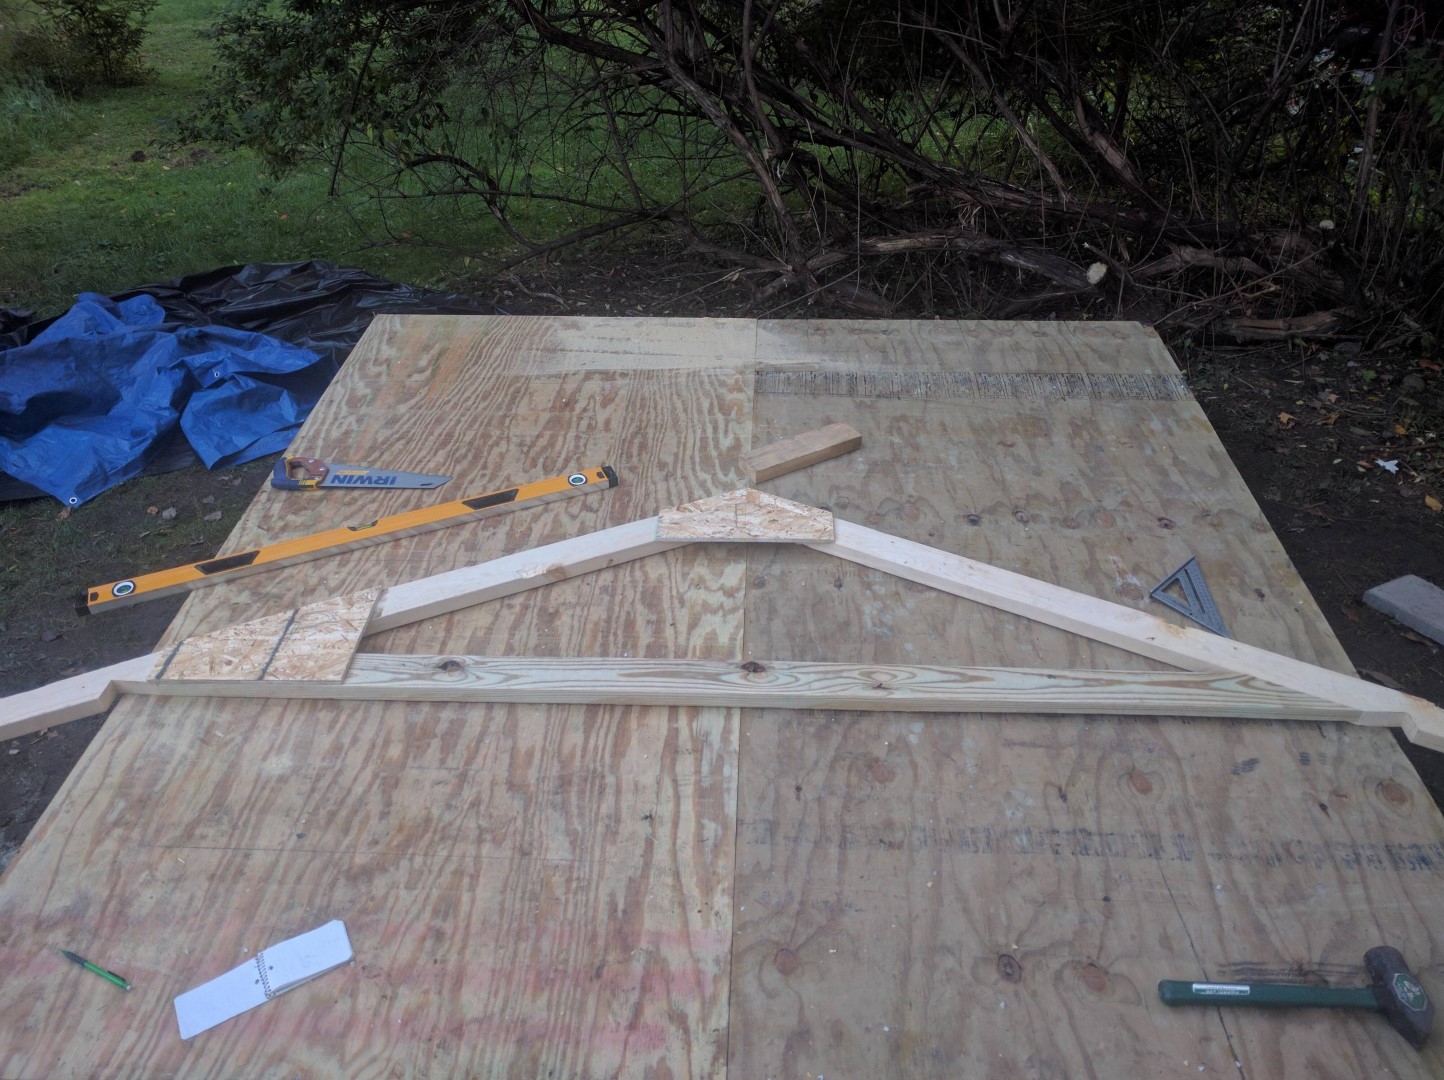
For a number of reasons I decided to build my own trusses. Pictured is the first prototyped bits that will be used as templates for the rest of the trusses. 2x4, 5.5’ rafters, 7/16” OSB gussets, and 2x4 rafter ties which were pressure treated due to a lumber yard mishap.
Truss Production
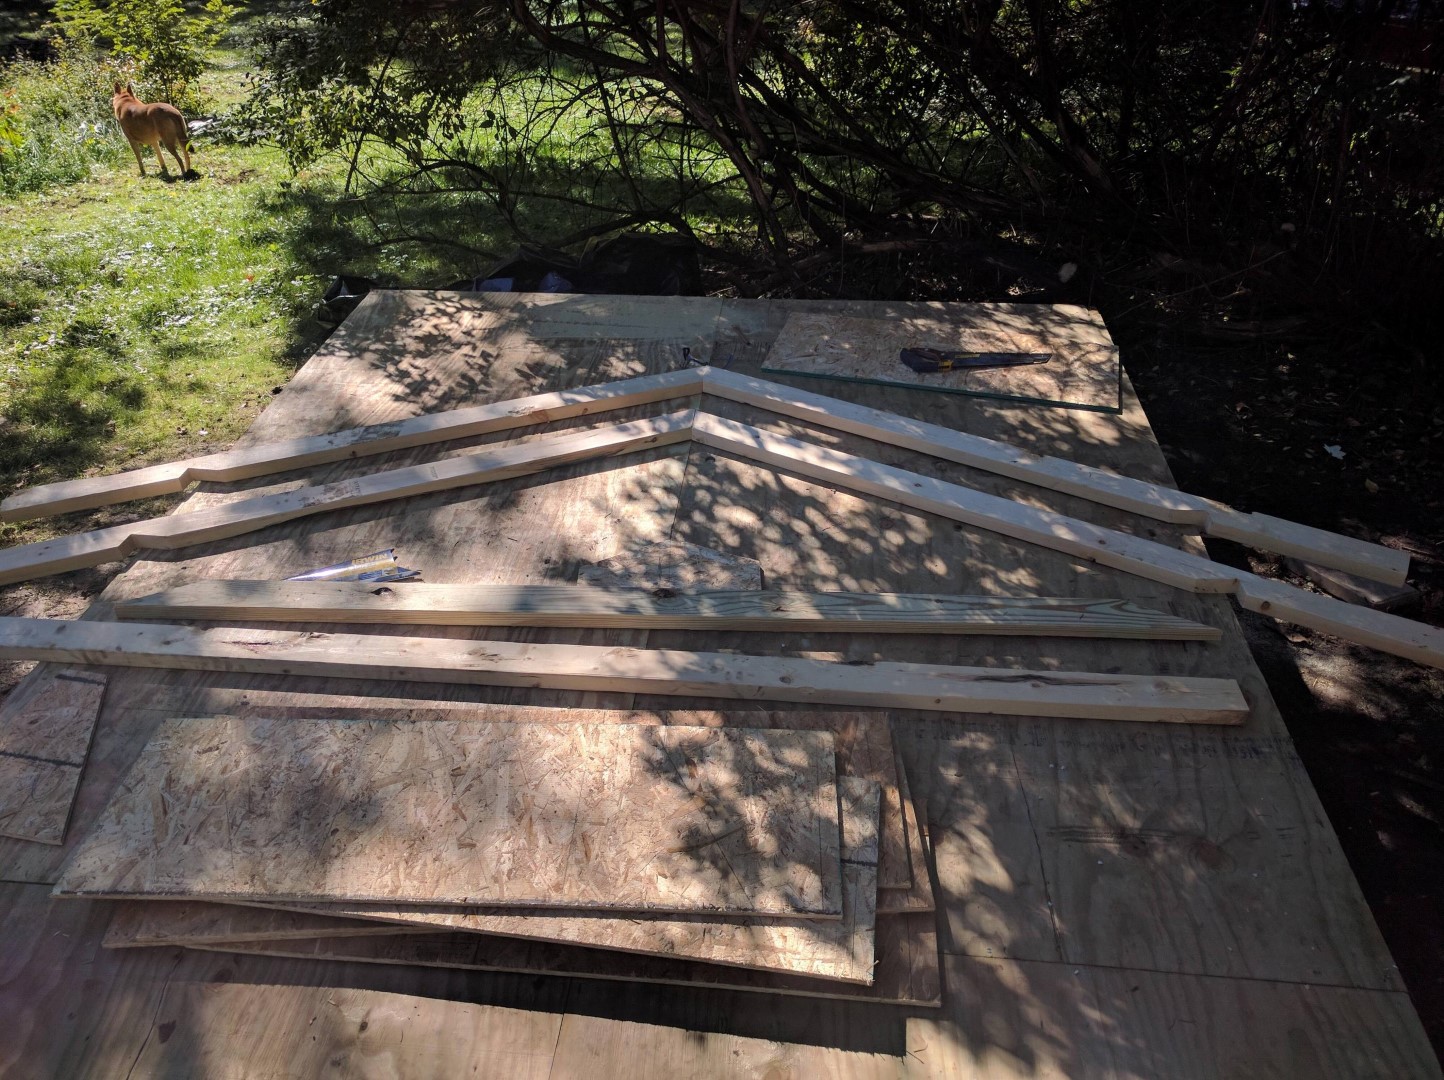 Once the prototype parts were good and proved to be reproducible, they were used to trace cut lines onto the rest of the material. Bonus dog.
Truss Assembly Line
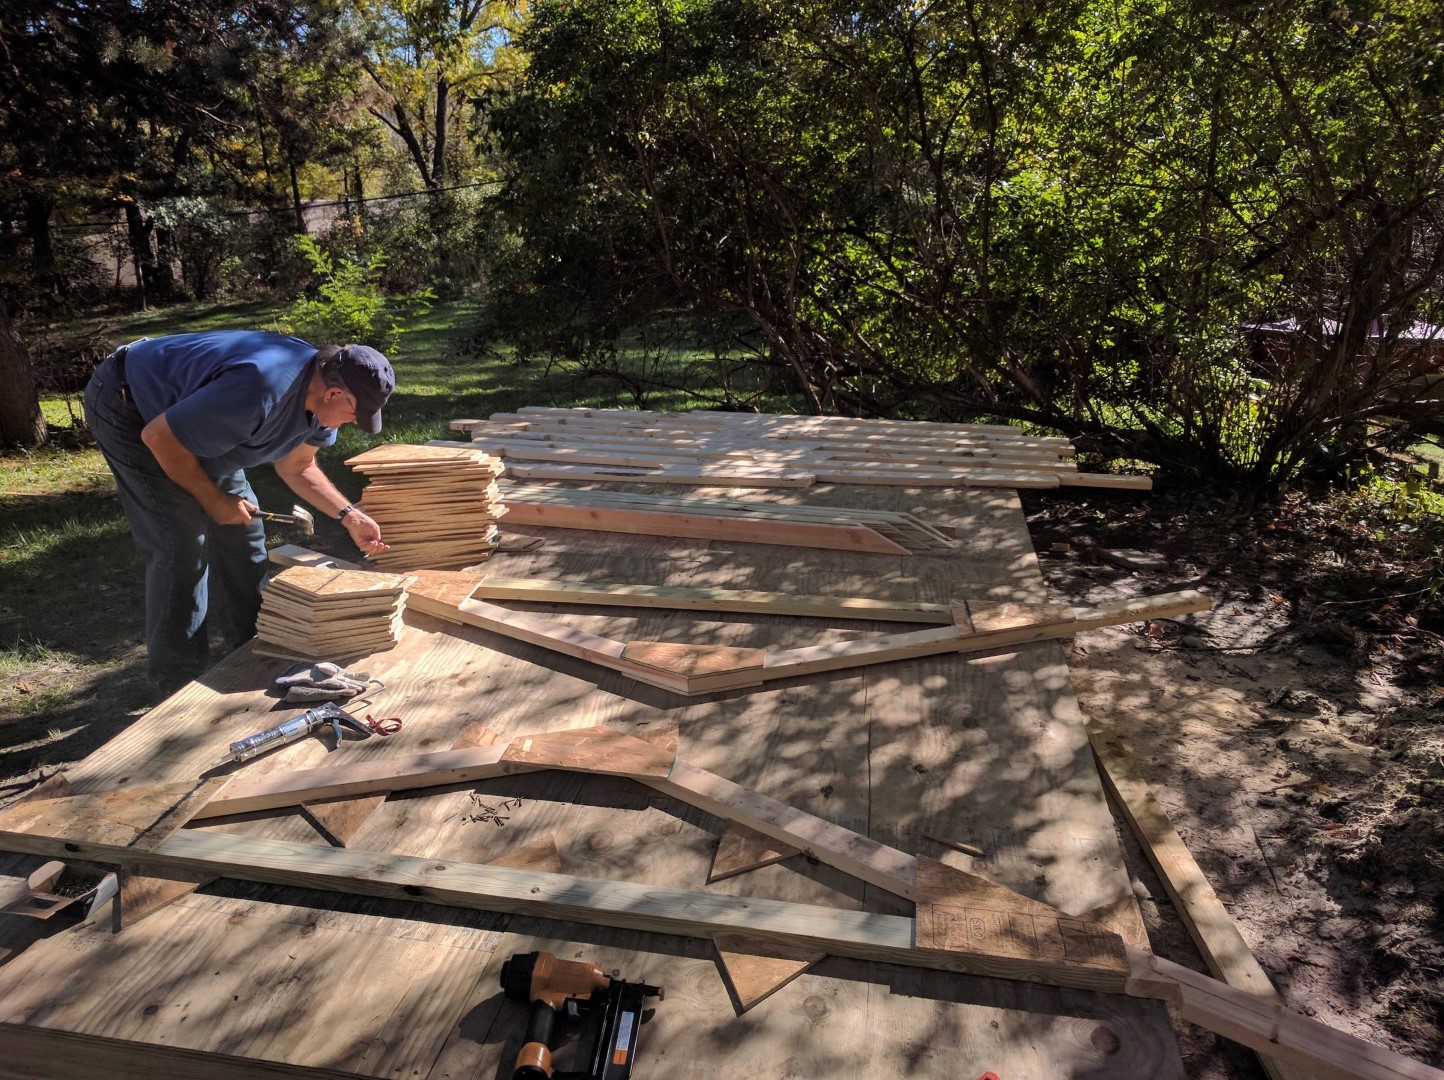 All the parts were cut and laid out on the deck. Scrap OSB was tacked onto the floor to provide guides for truss assembly. Gussets were glued, tacked into place with a finish nailer and then secured with about 12 4D nails. Bonus dad.
First Frame Done
 Measured 24” OC. If I were to do it again I’d have done double studs every 48” to make nailing the siding on easier.
Frames Done
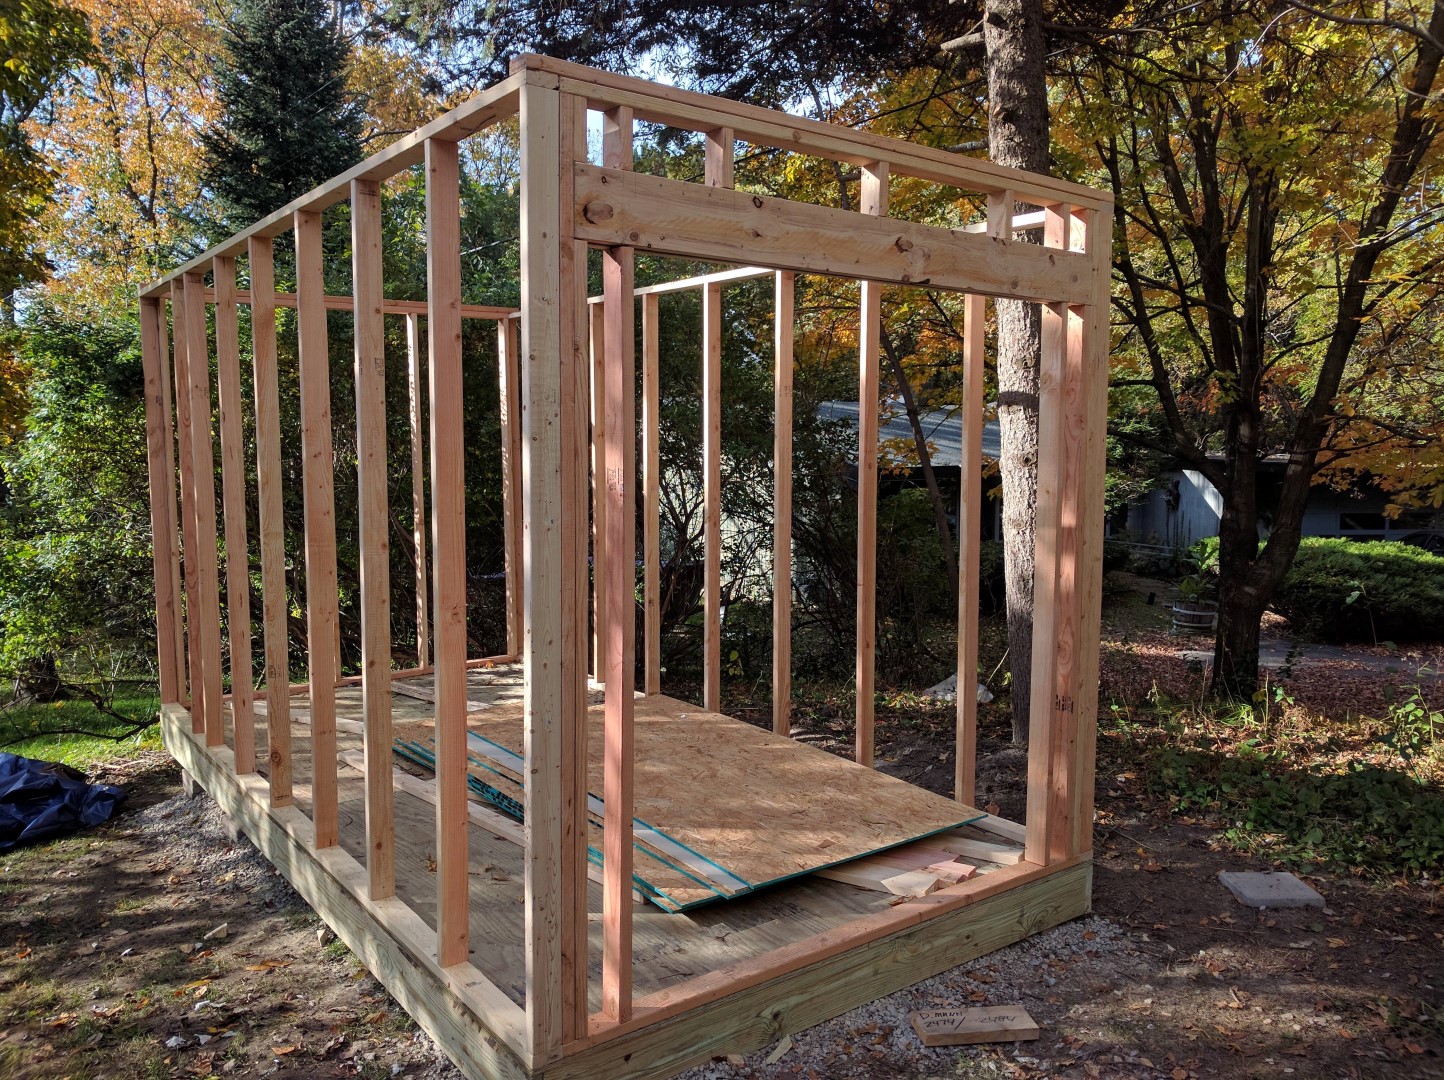 Those are full 8’ studs so there’s plenty of headroom. I framed for a door on the left side in case I decide it necessary down the road.
Trusses up

Siding and Roof Sheathing Nailed On
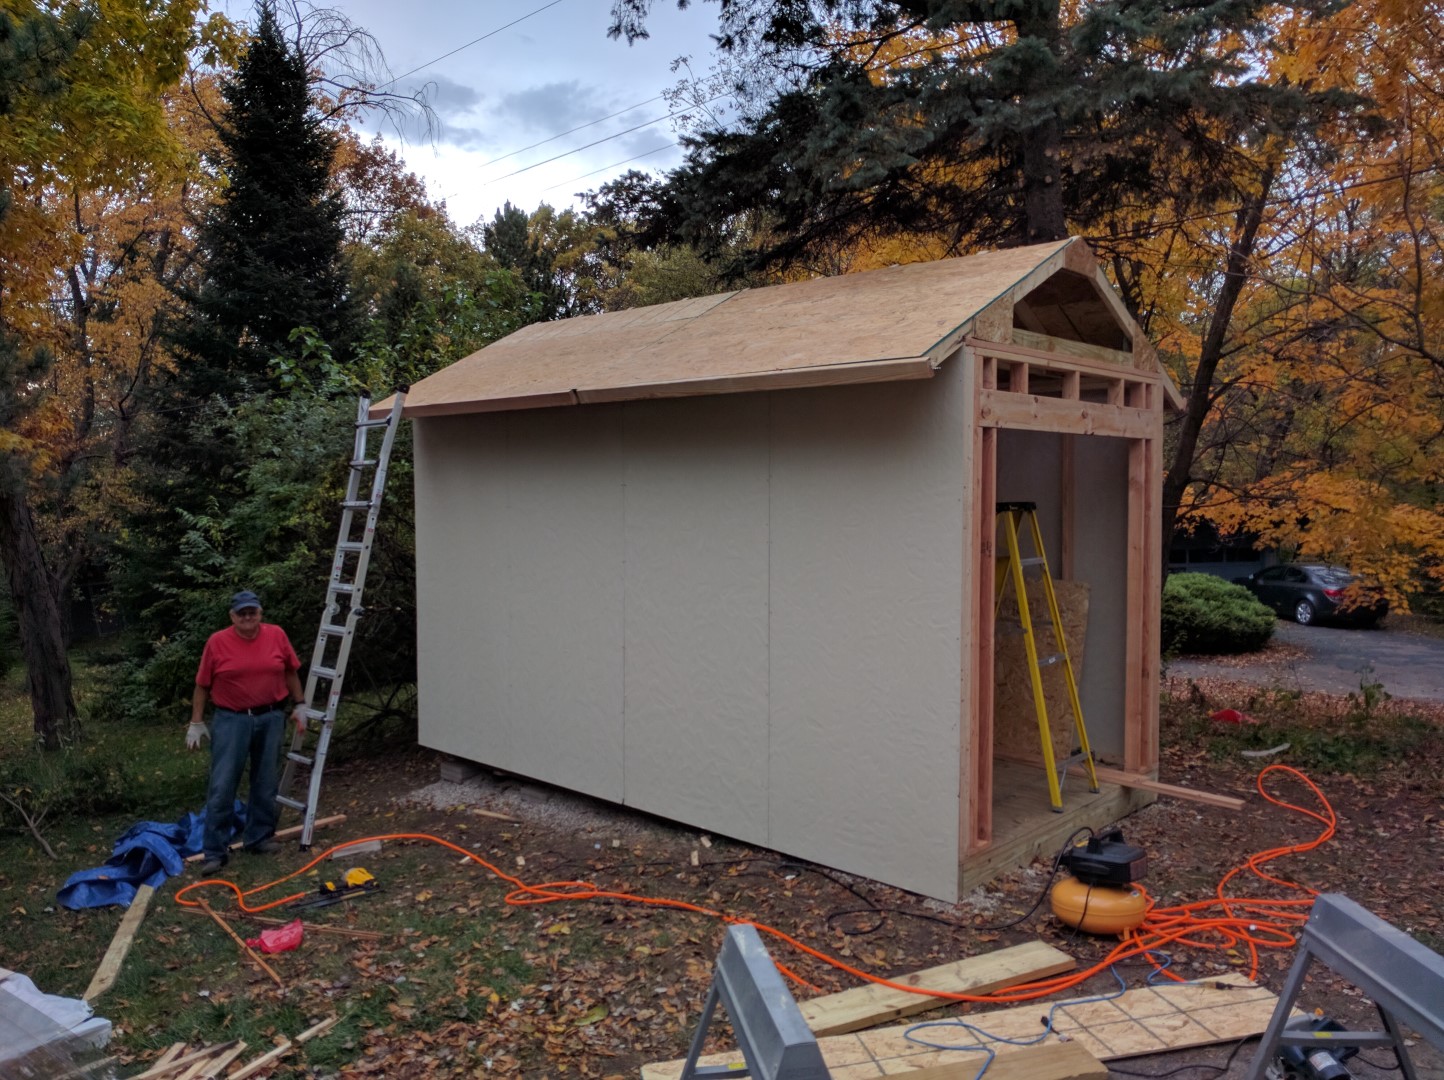 I used 9’ fiber cement boards. They were a huge pain. They weigh a ton, are extremely difficult to nail onto the studs, and break easily. Next time I’d back it with OSB or save money and buy something else, like engineered wood siding.
Steel Screwed In
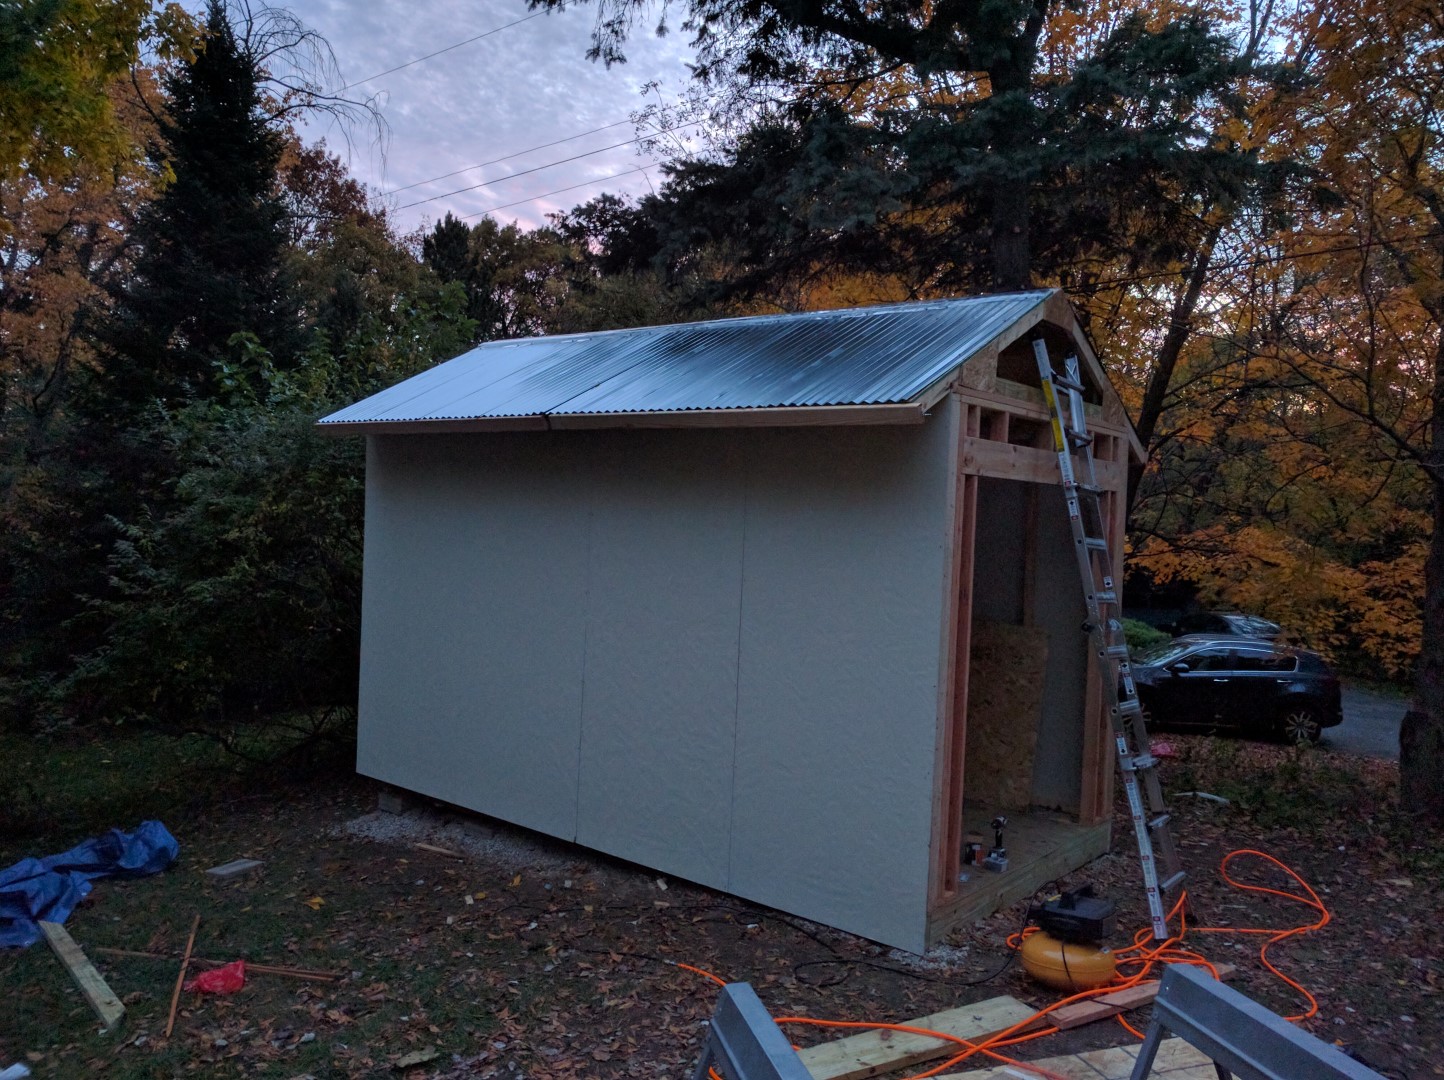 Galvanized corrugated steel is cheap and effective. Lining it up and keeping it straight across the whole roof proved a little challenging, though.
Installing the Roof Cap: How to Ride a Shed
 The only way I could figure to screw in the roof cap was to sit on top ride it like a cowboy would.
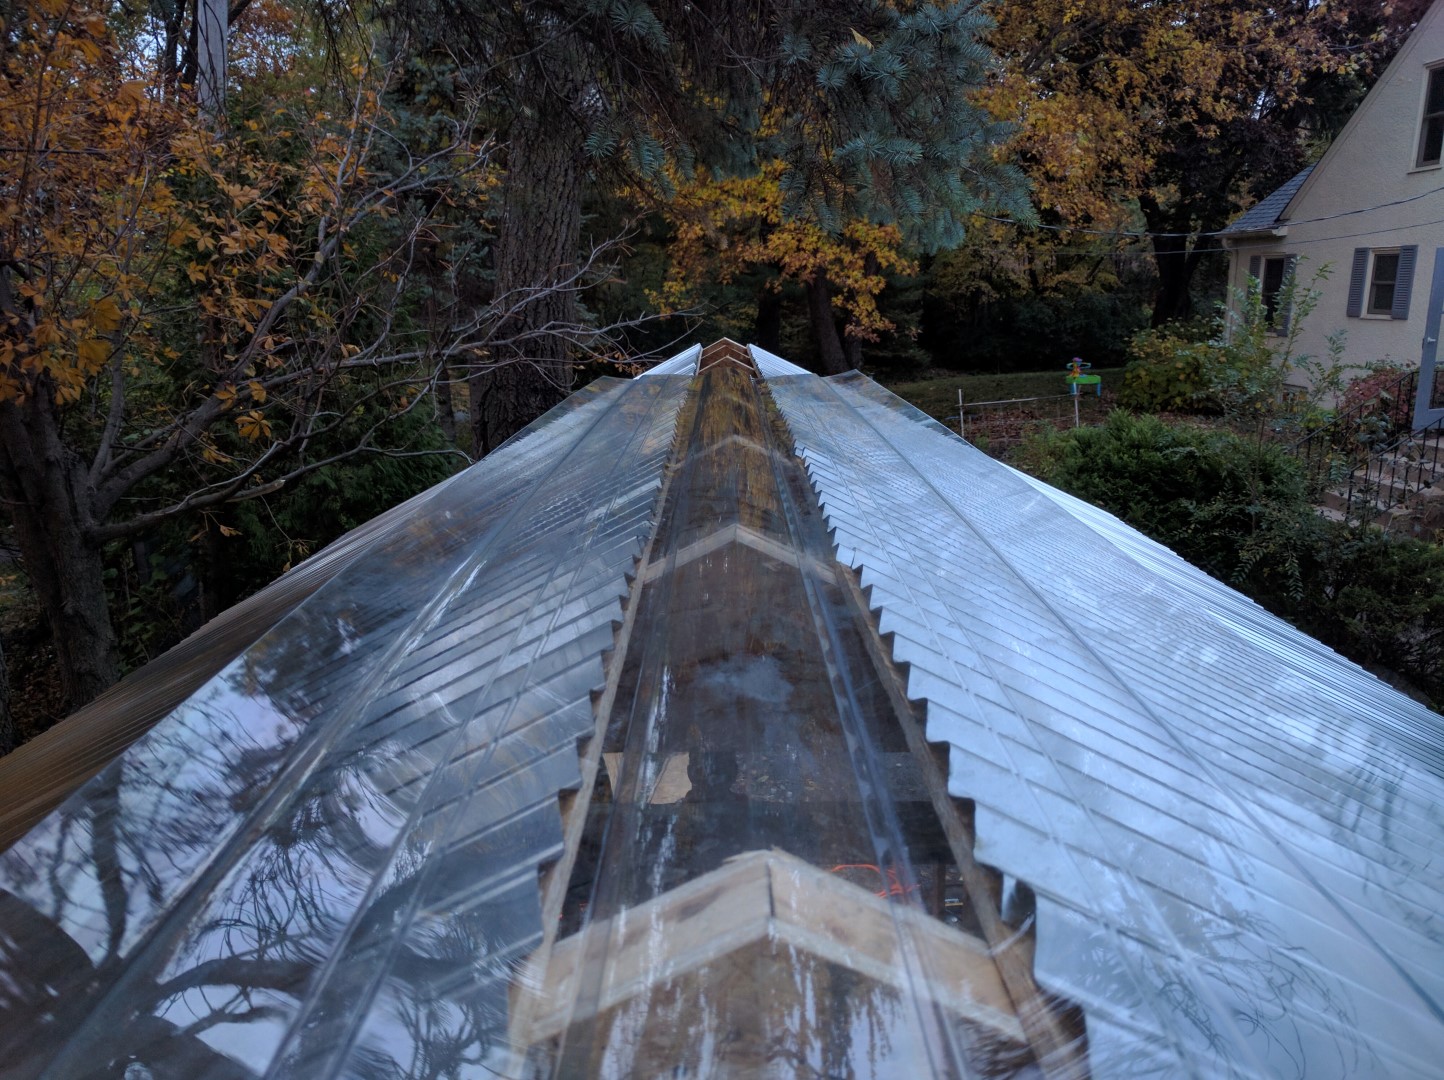
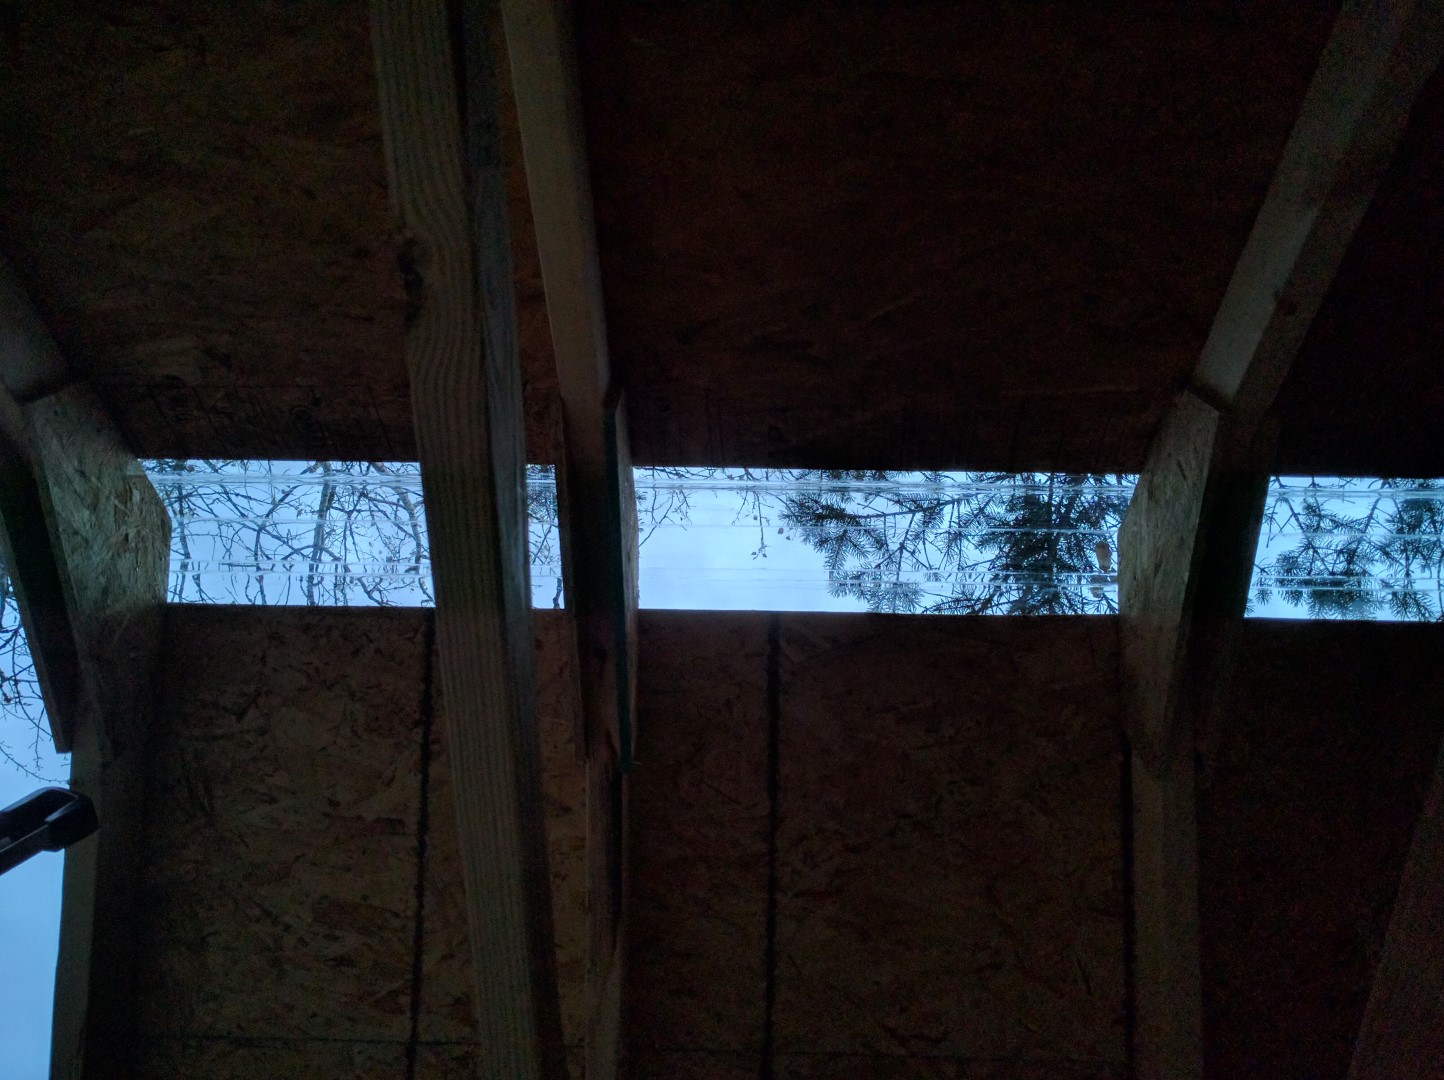
Clear PVC Roof Cap Let’s in a Lot of Light
Roller Door Installed
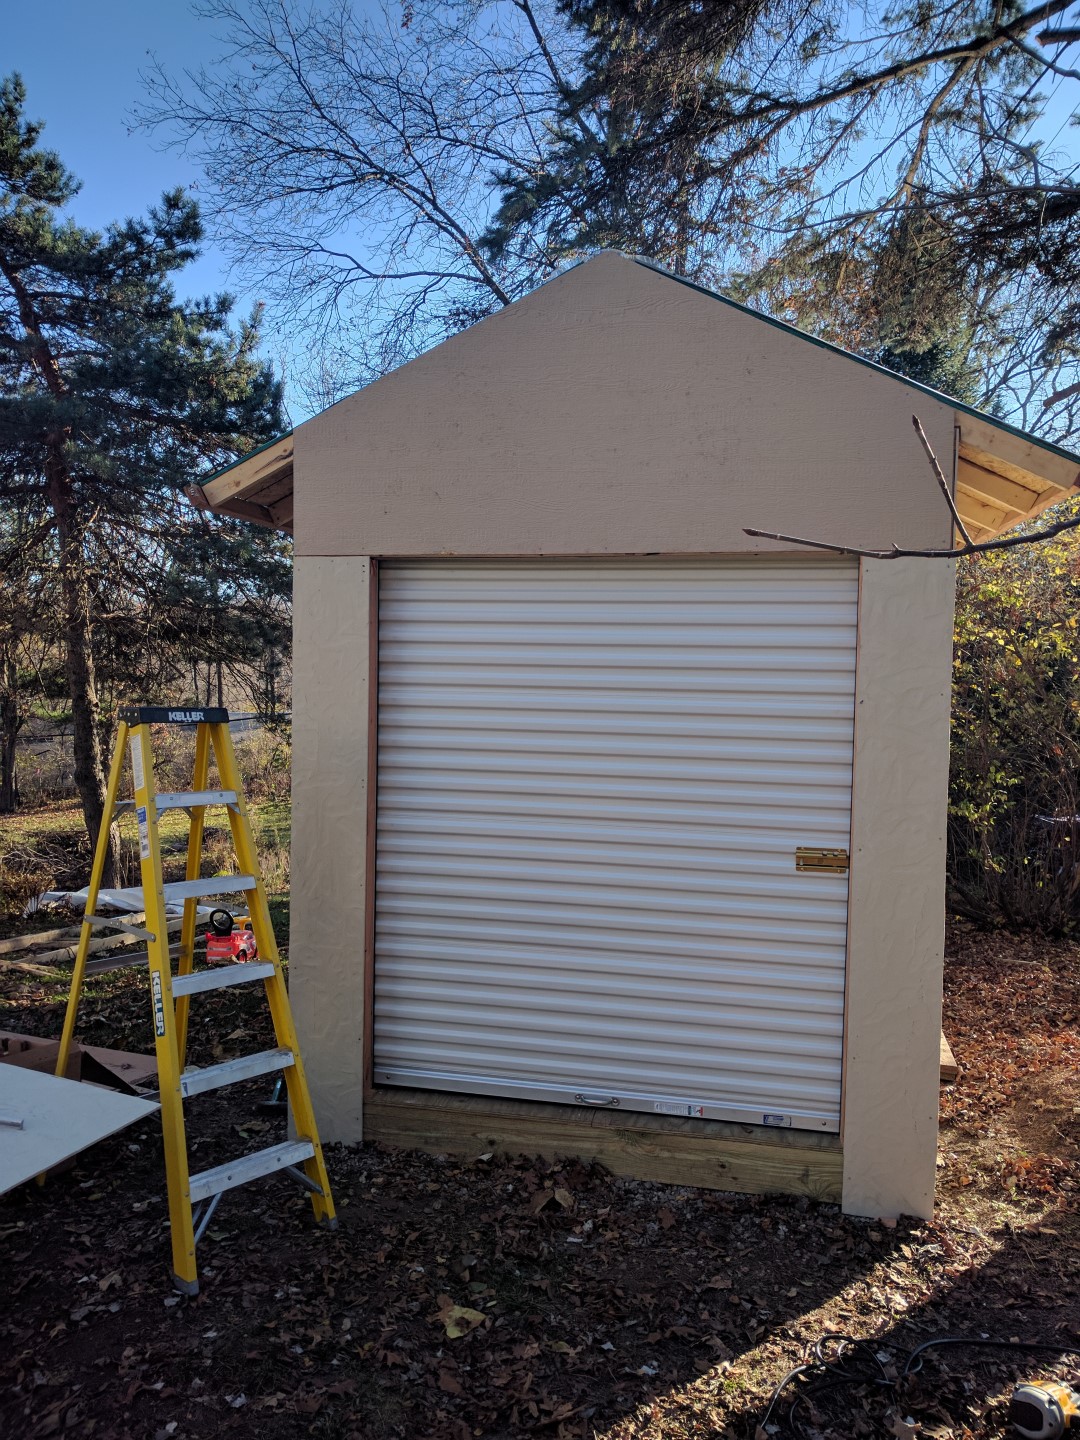 6’x7’ roller door. Piece of cake to install once I decided to ignore the instructions.
Paint. Finished
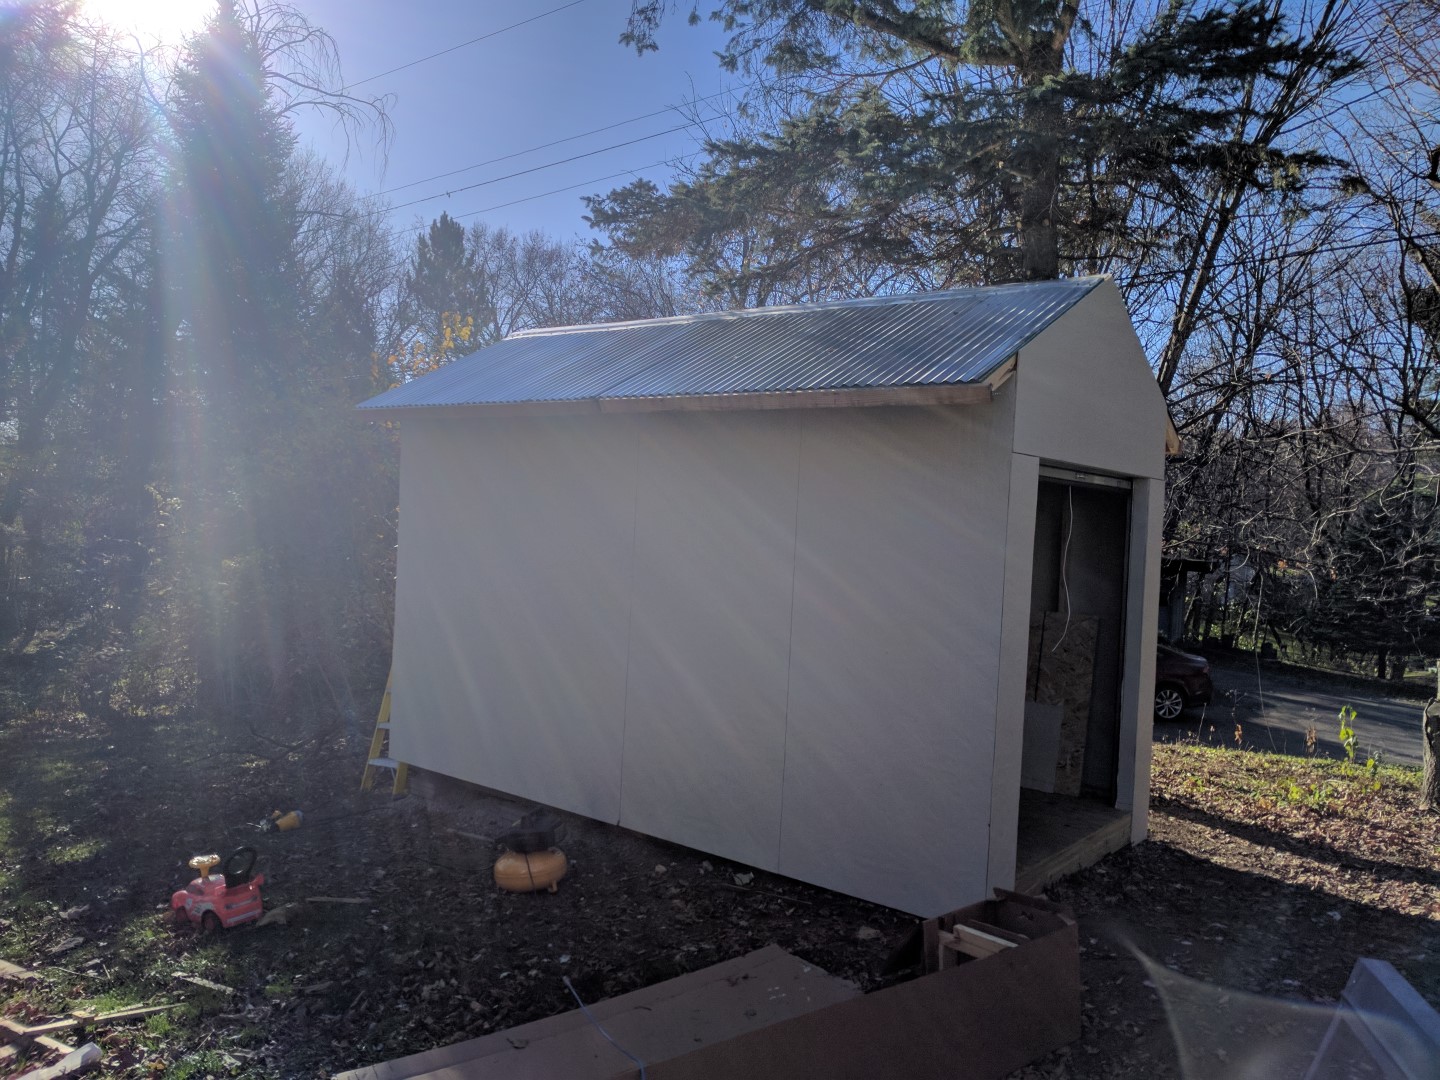 Painted to match the house. Still needs flashing on the roof but that can wait until spring. Time to fill it with stuff!